![]() |
Thursday, August 6, 2015
No luck in Wisconsin, back to Montgomery, IL
Kyle and I had just returned from a couple nights camping just North of Wisconsin Dells yesterday. We brought the KL250 along but never unloaded it because there was nowhere in the area that we found to ride it. We decided to bring it to Montgomery the following day and went kayaking on the Wisconsin River instead.
Monday, April 6, 2015
Nevin's first ride
Today I taught Nevin to ride on the Kl250. Since my plan was to get the bike running and use it to teach both of my sons to ride on it, that felt good. He learned very quickly, popped a wheelie the first time he pulled the clutch out! I am a bad teacher, but nobody got hurt.
![]() |
![]() |
![]() |
Add caption |
Installed new chain
The chain was at its limits, and the sprockets were both like-new. I purchased the cheapest o-ring chain that I could find on ebay. It arrived today so it got installed.
![]() |
Monday, March 30, 2015
Kyle's first ride
Today, Kyle and I went to Farm and Fleet to get him a helmet. We brought the bike with using the Harbor Freight motorcycle carrier, to test that out. There are trails behind the store, where I have taken my KLR a few times. We had a great time, and Kyle learned really fast. I'm already looking forward to the next time... hopefully with my KLR and more time to kill!
![]() |
Kyle got stuck in the same spot twice, but did not drop it either time |
![]() |
This was the second time getting stuck, a classic 'no need for a kick stand' moment! |
![]() |
The Harbor Freight motorcycle carrier did fine, but our Jeep Patriot's suspension sagged a little too much |
Tuesday, March 24, 2015
New tires!
I removed the wheels on Tuesday and this is how the bike sat until Saturday when I re-installed them with their new Kenda K270's. New treads just seem to make the bike look much better.
![]() |
Waiting patiently for new treads |
![]() |
Wednesday, February 25, 2015
Installed intake and exhaust
I had to remove the rear tire in order to install the exhaust, but no big deal w/o the chain. The intake side was nice and easy without an airbox. I will have to rejet after we get it running of course.
![]() |
46mm pod filter from Amazon.com |
![]() |
The carb looks nicer without the accelerator pump |
![]() |
Yes, that is electrical tape on the carb holder... for now |
![]() |
Gotta paint the header at some point |
![]() |
The muffler mod was performed by the PO |
Tuesday, February 17, 2015
Extracted a broken bolt and installed handlebars
When I began to install the handlebars (just to make it easier to roll the bike around), I found a broken bolt in the top clamp. Luckily, I had a set of handlebar bolts from a previous parts bike. Fortunately, the remnants of the bolt came out easily.
![]() |
![]() |
![]() |
These bars are very temporary |
Inspected the parts bike carburetor
Since it was sitting in a box, I figured it would be wise to do a quick inspection of the carb before installing it. It looked pretty clean and correct, except for the brass pipe that extends from the bowl into the choke - side of the throat. I believe there is a tiny hole at the tip, which was clogged. Also, the pilot air screw was MIA along with a couple of o rings and a spring for the accelerator pump. I found the pilot screw on ebay using the Kawasaki p/n, and the accelerator pump circuit will most likely get bypassed when we re-jet.
![]() |
I just realized that this is the jet for the accelerator pump, so this clog is irrelevant if we bypass it! |
![]() |
Checking the float height; about 21mm with a slight push down |
Purchased a parts bike
I found this kl250 basket case listed on Craigslist as a kz250, about an hour drive from my home. The owner had lost interest in the project (working on a different bike now-- sounds familiar!) and just wanted it gone. I picked it up real cheap, and plan to reassemble it and get it running. I may swap some parts (air box, exhaust, etc) from the other bike to build this one as a dirtbike and the other one more of a road bike.
![]() |
Pulled over on the way home to snap a couple sunset pics |
![]() |
The exhaust is in the bag |
![]() |
Just loosely bolted the front wheel on for now |
Friday, February 13, 2015
Installed capacitor to delete the battery
Permanent magnet rotor plus magneto ignition equals: who needs a battery?
I mounted the capacitor using the rubber boot from the turn signal flasher. I don't plan to have turn signals, but left the flasher installed with cable ties for now.
I checked the voltage while running, and was pleased that it was around 7 - 7.3 volts. On a 6 volt charging system, I think that will be fine.
Saturday, January 31, 2015
First start, first ride!
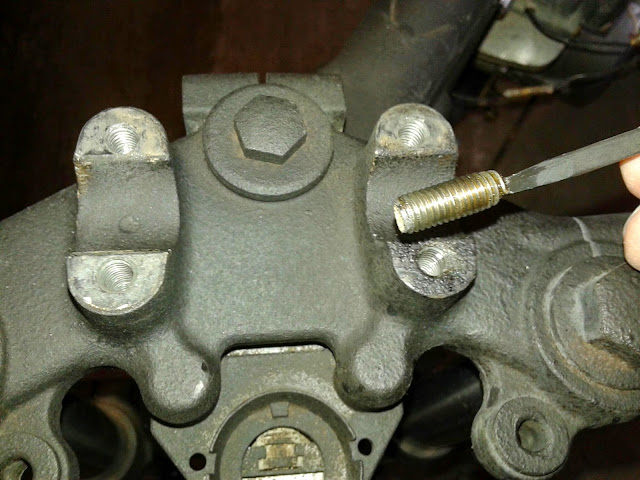
Yesterday, we figured out why the ignition was not working (a short in the main harness apparently). After disconnecting the plug (pictured), we had spark. I had already unplugged the kill switch and ignition switch, but there must be a wiring fault in between that connection and the headlight bucket.
![]() |
I had to leave this connector unplugged for now. |
Even though we had no bolts to hold the throttle / brake lever pod, I went for a short ride down the block. I knew it was unsafe to ride with the throttle and brake lever moving around loosely, but it turned out okay.
Subscribe to:
Posts (Atom)